In ROS Control, Unit 3 and 5, we are creating and implementing controllers for RRbot and Manipulator respectively.
Question 1:
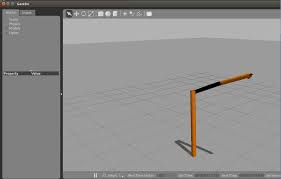
In Unit 4, using rrbot, we want it to move to a position, based on input.
Here, we are inputting Position to get an Effort output. if we wanted an effort outcome, why not just give effort itself as input to the effort controller and use JointEffortController instead of JointPositionController which has to convert the position to effort?
The YAML file content:
rrbot:
  joint_state_controller:
    type: joint_state_controller/JointStateController
    publish_rate: 50

  joint1_position_controller:
    type: effort_controllers/JointPositionController
    joint: joint1
    pid: {p: 100.0, i: 0.01, d: 10.0}
  joint2_position_controller:
    type: effort_controllers/JointPositionController
    joint: joint2
    pid: {p: 100.0, i: 0.01, d: 10.0}
Question2:
Launch file for rrbot :
<launch>

  <rosparam file="$(find my_robot_control)/config/my_robot_control.yaml" command="load"/>

  <node name="controller_spawner" pkg="controller_manager" type="spawner" respawn="false"
    output="screen" ns="/rrbot" args="joint1_position_controller joint2_position_controller joint_state_controller"/>

  <node name="robot_state_publisher" pkg="robot_state_publisher" type="robot_state_publisher"
    respawn="false" output="screen">
    <remap from="/joint_states" to="/rrbot/joint_states" />
  </node>

</launch>
Launch file for Manipulator:
<launch>

 <!-- Load configuration file -->
  <rosparam file="$(find om_control)/config/om_control.yaml" command="load"/>

  <!-- Start joint state controller -->
  <node name="joint_state_controller_spawner" pkg="controller_manager" type="controller_manager" output="screen"
    args="spawn joint_state_controller" respawn="false"/>

  <!-- Start arm controller -->
  <node name="arm_controller_spawner" pkg="controller_manager" type="controller_manager" respawn="false" output="screen" args="spawn arm_controller"/>

  <!-- start robot state publisher -->
  <node pkg="robot_state_publisher" type="robot_state_publisher" name="robot_state_publisher" output="screen">    <param name="publish_frequency" type="double" value="100.0" />
    <param name="tf_prefix" type="string" value="" />
  </node>

  <!-- start fake calibration -->
  <node pkg="rostopic" type="rostopic" name="fake_joint_calibration"
        args="pub /calibrated std_msgs/Bool true" />

</launch>
Question 2A) Now comparing both the launch files, why are we using different python files type=" spawner" in rrbot and type="controller_manager" in Manipulator to run the controllers? is’t the controller manager common to all the controllers?
For rrbot:
node name="controller_spawner" pkg="controller_manager" type="spawner"----
For Manipulator:
node name="arm_controller_spawner" pkg="controller_manager" type="controller_manager"---
Question 2B) In rrbot launch file, we launched all the controllers under a single node, as arguments, including the joint state controller as shown below
args="joint1_position_controller joint2_position_controller joint_state_controller"/>
But when we are launching the Manipulator, we are using 3 separate nodes to do so, why are we taking this approach?
<node name="arm_controller_spawner"----------
<node pkg="robot_state_publisher"---------------
<node pkg="robot_state_publisher"------------
Question 3)
What is the purpose of args=“spawn” in launch file of Manipulator?
  <node name="joint_state_controller_spawner" pkg="controller_manager" type="controller_manager" output="screen"
    args="spawn joint_state_controller" respawn="false"/>

 <node name="arm_controller_spawner" pkg="controller_manager" type="controller_manager" respawn="false" output="screen" args="spawn arm_controller"/>
Question 4)
Upon running the launch files mentioned above, we get the below mentioned topics
rrbot:
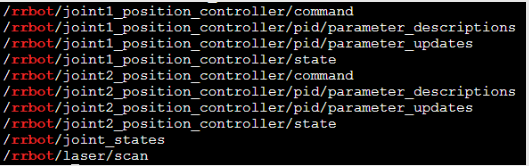
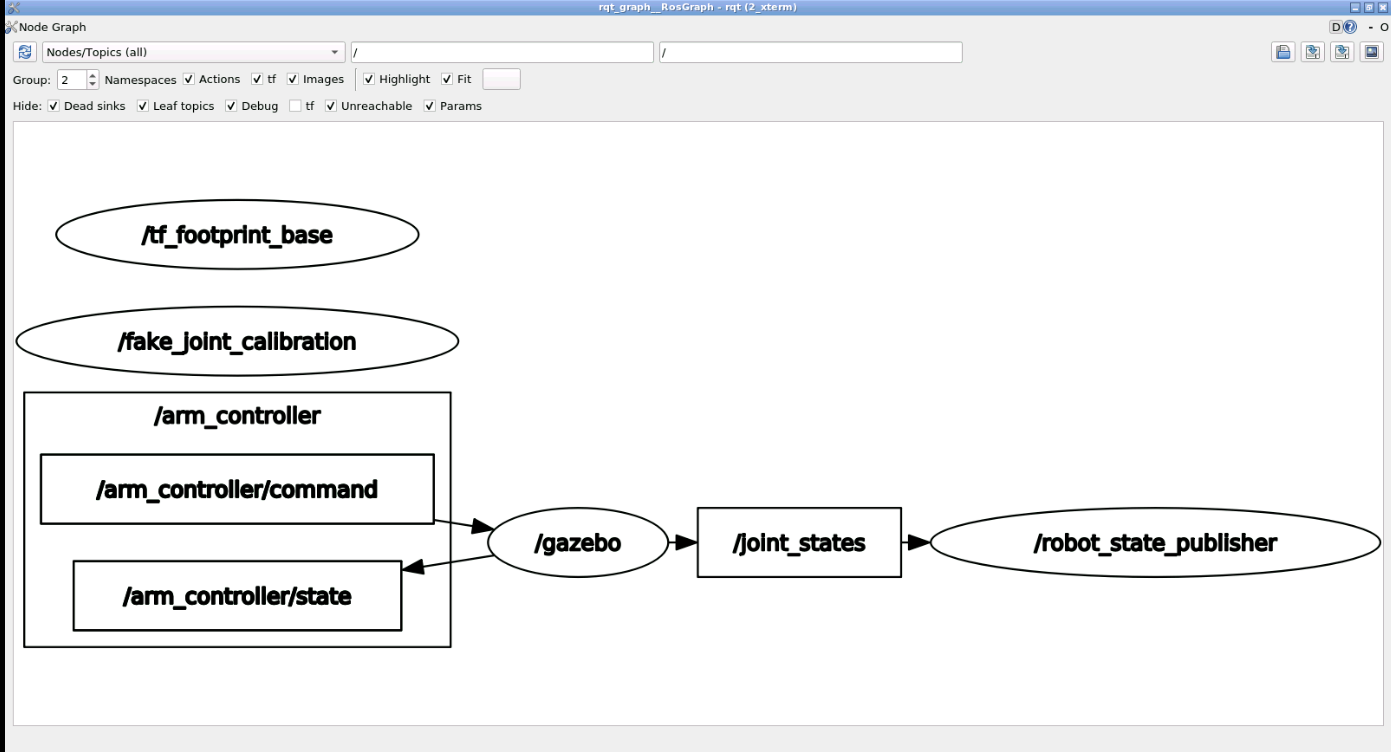
And In Manipulator:
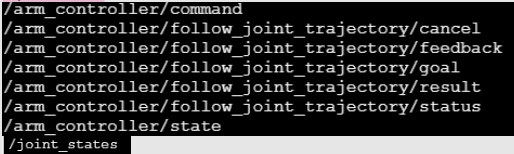
Now i could not find any mention of a python file in the course content that lead to the generation of the topics /rrbot/joint1_position_controller/pid/parameter_description and /rrbot/joint1_position_controller/pid/parameter_updates in rrbot and also the code that lead to the generation of the action server related topic /arm_controller/follow_joint_trajectory/cancel , /result , /status etc in Manipulator.
Could you tell me how these topics were created since they were not generated by the controller package, while /command, /state, and /joint_states are created by the controller package?
Question 5:
In Unit 4, source code my_controller.cpp ,used to create custom controllers, is written in C++. Would you happen to have this code in python, since the C++ version is a bit more tricky to work and i am proficient, at the moment, only in Python.
Can you also do the same for unit 6 - Hardware Abstraction Layer, since all the code (though the general concept is explained) is written in C++ .
Question6:
The following is the explanation on Transmission from the course content, and i found similar explanantion on wiki ros too.
The transmission elements are used to describe the relationship between a joint and an actuator. A transmission transforms efforts/flow variables such that their product - power - remains constant.
Can you tell me what role Transmission element plays in Layman Terms?
Question 7:
What are the instances where PIDs are used in controller configuration? I am asking because PIDs were used in rrbot , but not in Manipulators, why is that? I thought PIDs were used in all the controllers irrespective of the input or output.
Question 8:
<node pkg="robot_state_publisher" type="robot_state_publisher" name="robot_state_publisher" output="screen">
    <param name="publish_frequency" type="double" value="100.0" />
    <param name="tf_prefix" type="string" value="" />
</node>
Can you tell me what the following variables are for since this is the first time I am seeing additional variables being added to robot_state_publisher? (No additional args used in TF chapter where this was introduced)
-
name=“publish_frequency” type=“double” value=“100.0” ?
-
name=“tf_prefix” type=“string” value="" ?
I understand that this is quite a lot, but if you could help me solve this, i would really appreciate it.
Thanks in advance